Step by step, on the real screens
Every picture below is the actual page you will see, with the thing to press ringed in orange. Watch the short video, or go through it one step at a time.
Or one step at a time
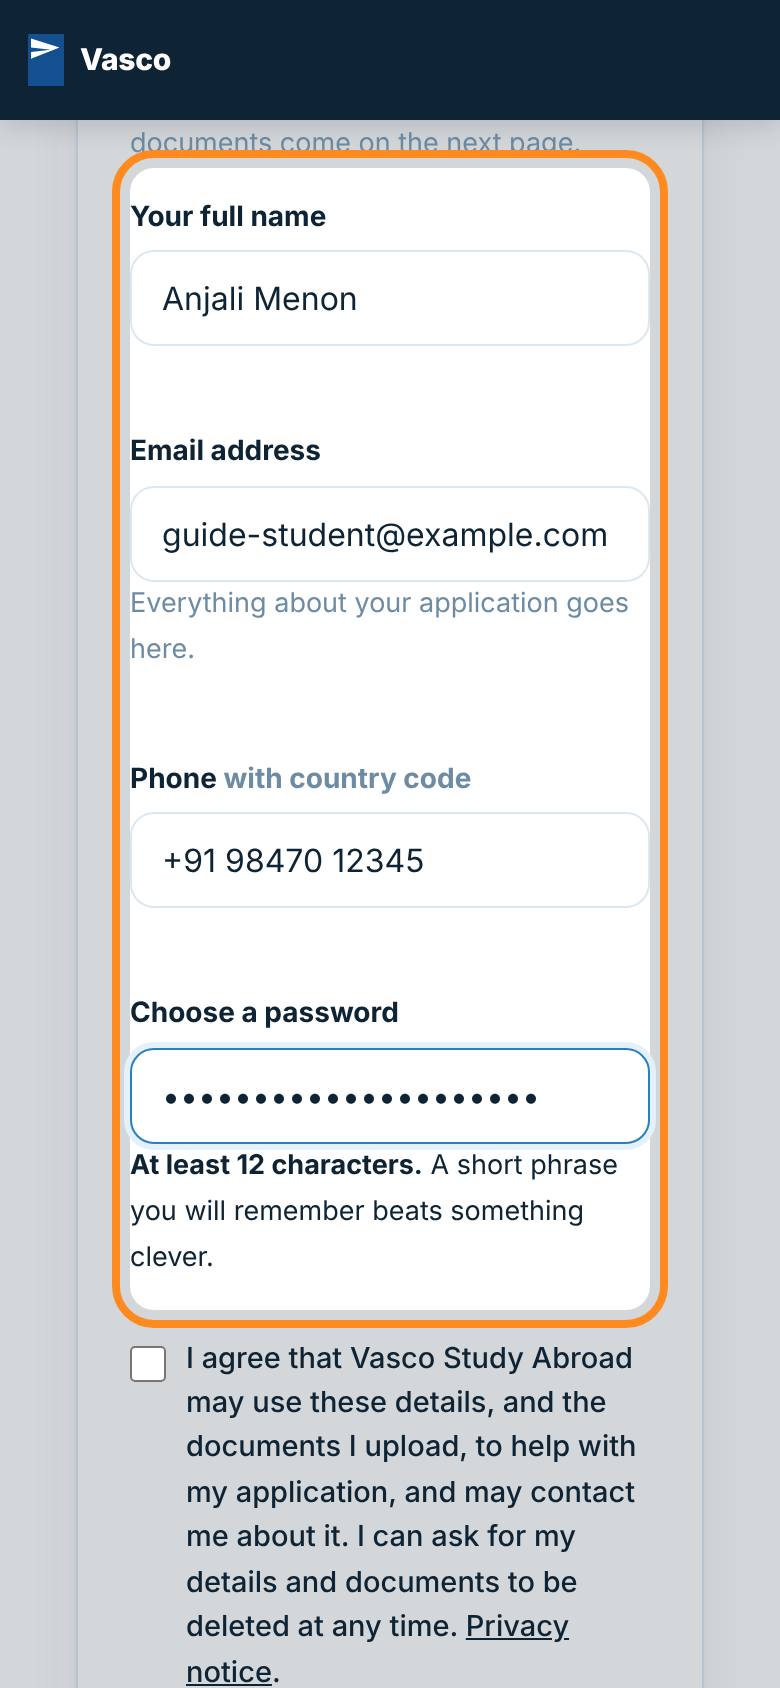 Step 1 of 13
Make your account
Go to vascostudyabroad.com/apply. Type your name, email and phone, and choose a password.
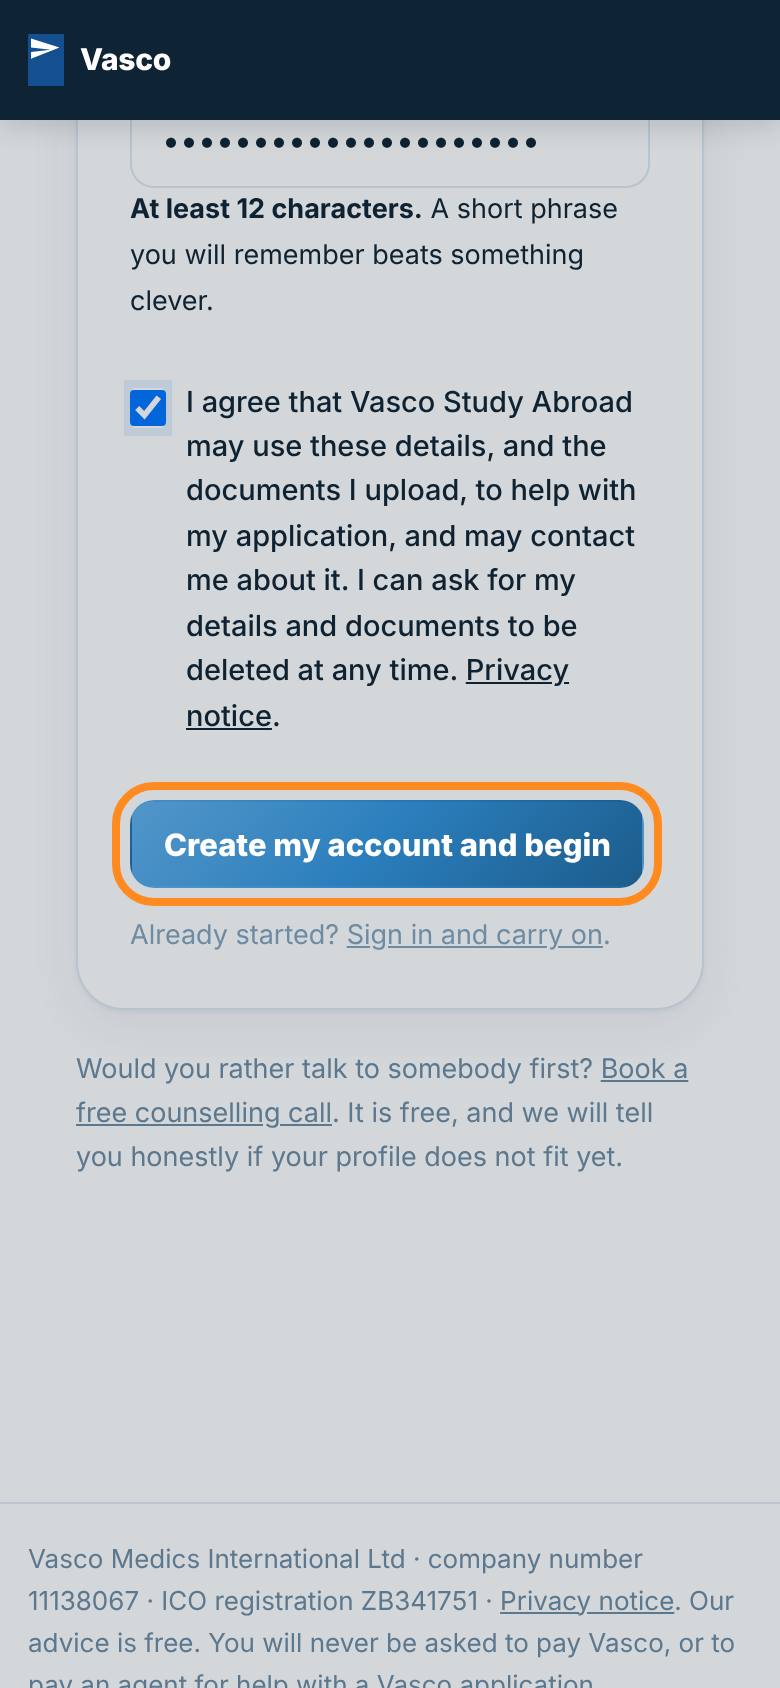 Step 2 of 13
Agree and begin
Tick to agree to how we use your details and documents, then press Create my account and begin.
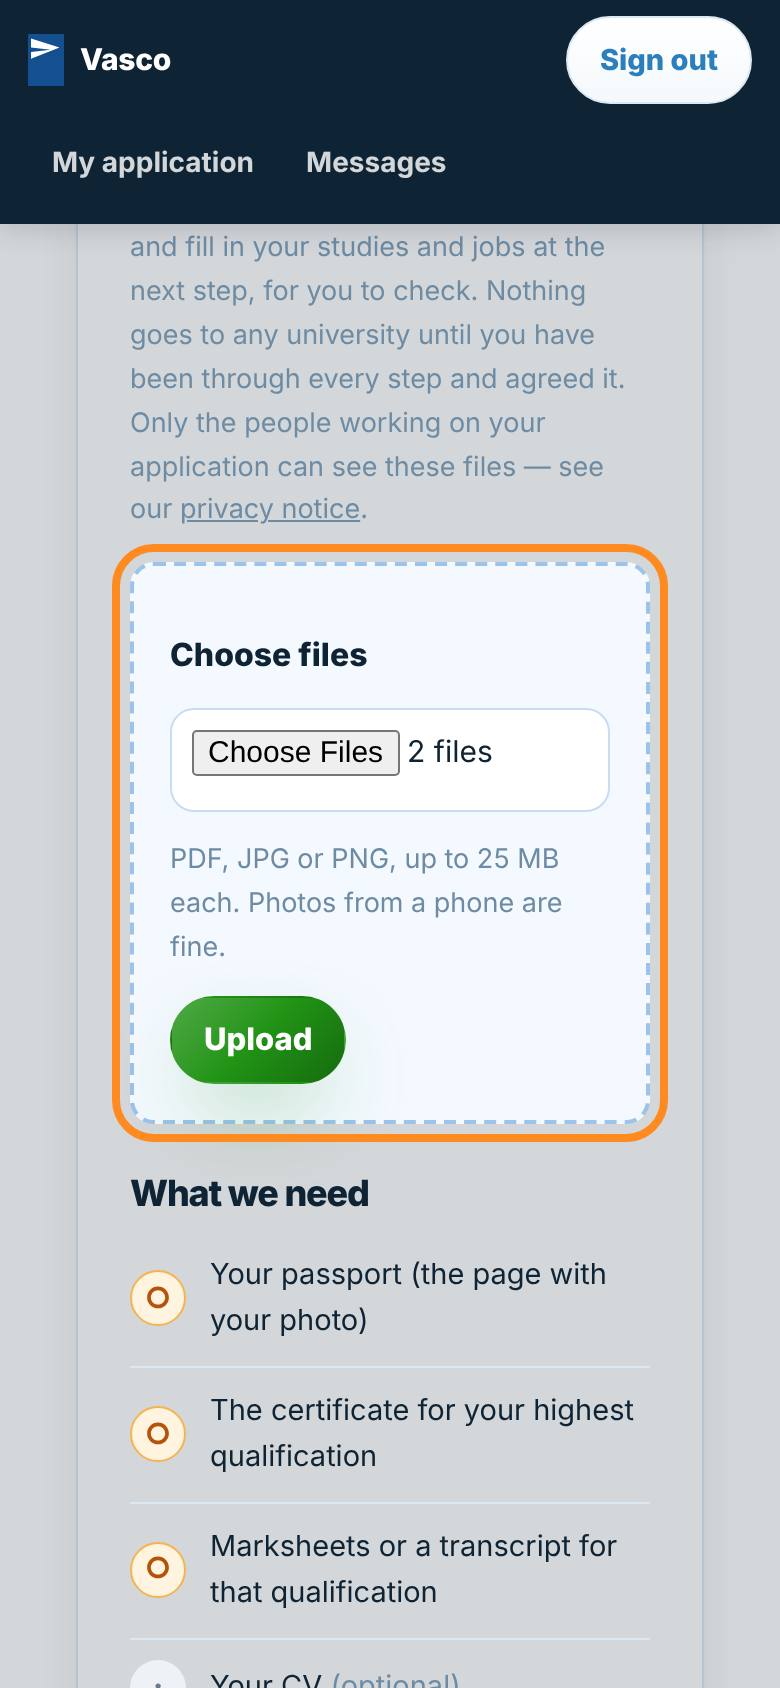 Step 3 of 13
Send all your documents at once
Press Choose files and pick everything: CV, passport, certificates, marksheets, letters, English result.
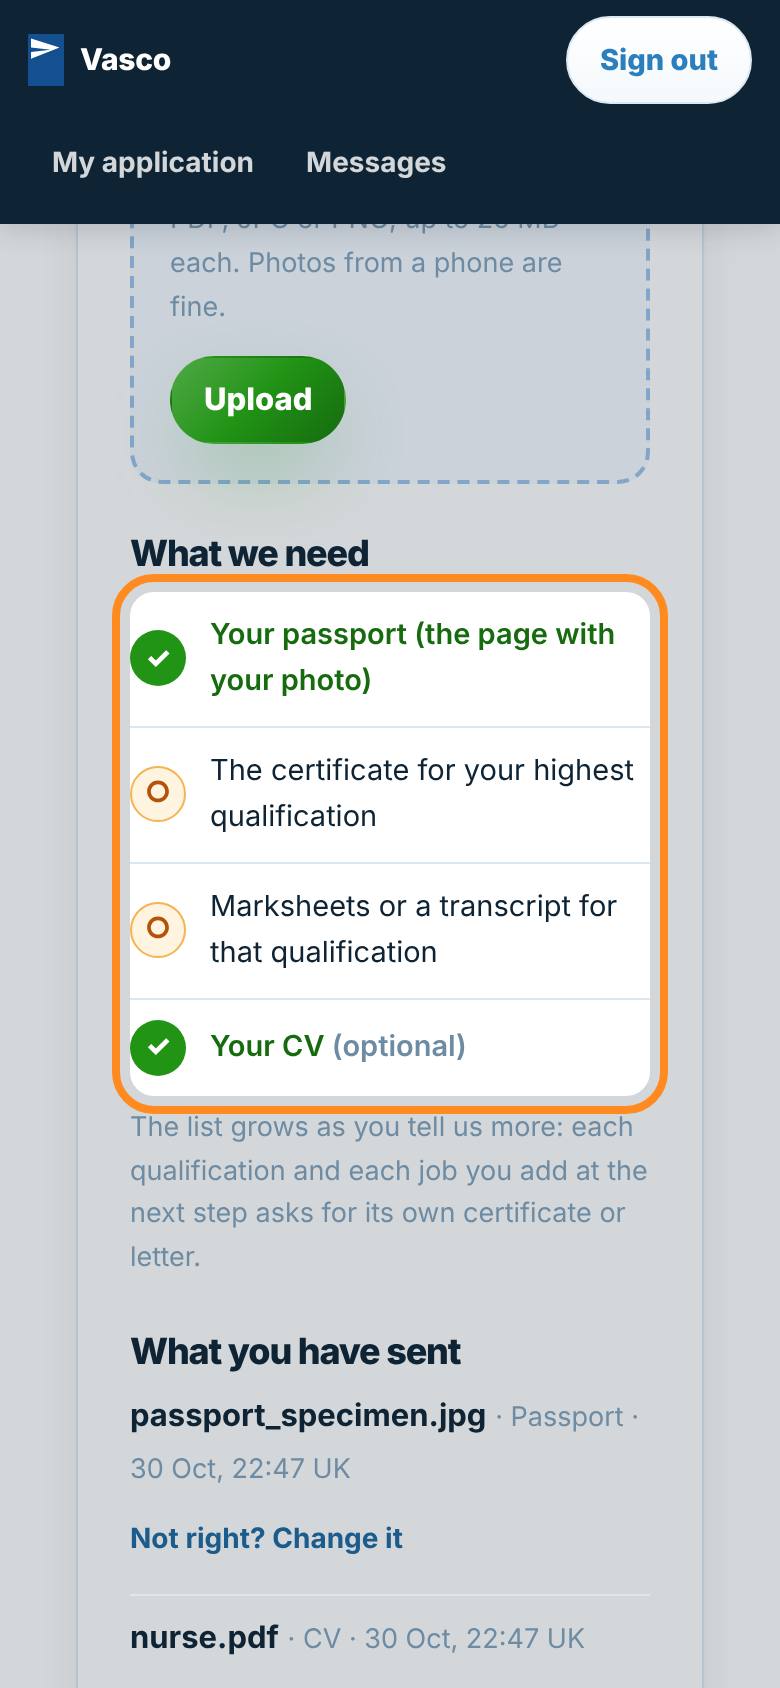 Step 4 of 13
See straight away what is in
Each file is checked and labelled. The list shows what is in, and what is still to come.
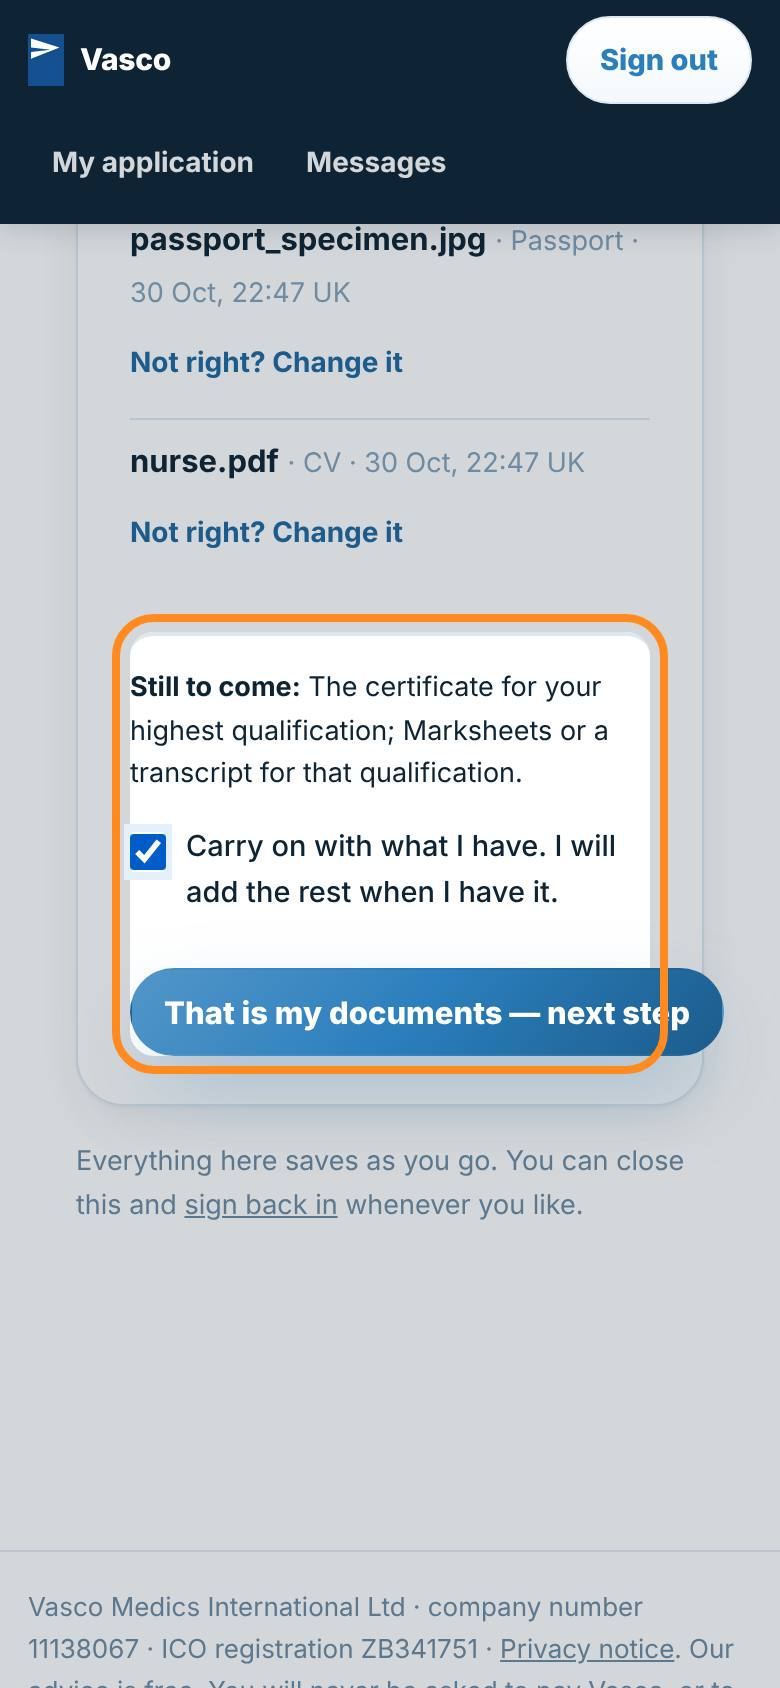 Step 5 of 13
Carry on when you are ready
Press here when you have sent what you have. You can always add more later.
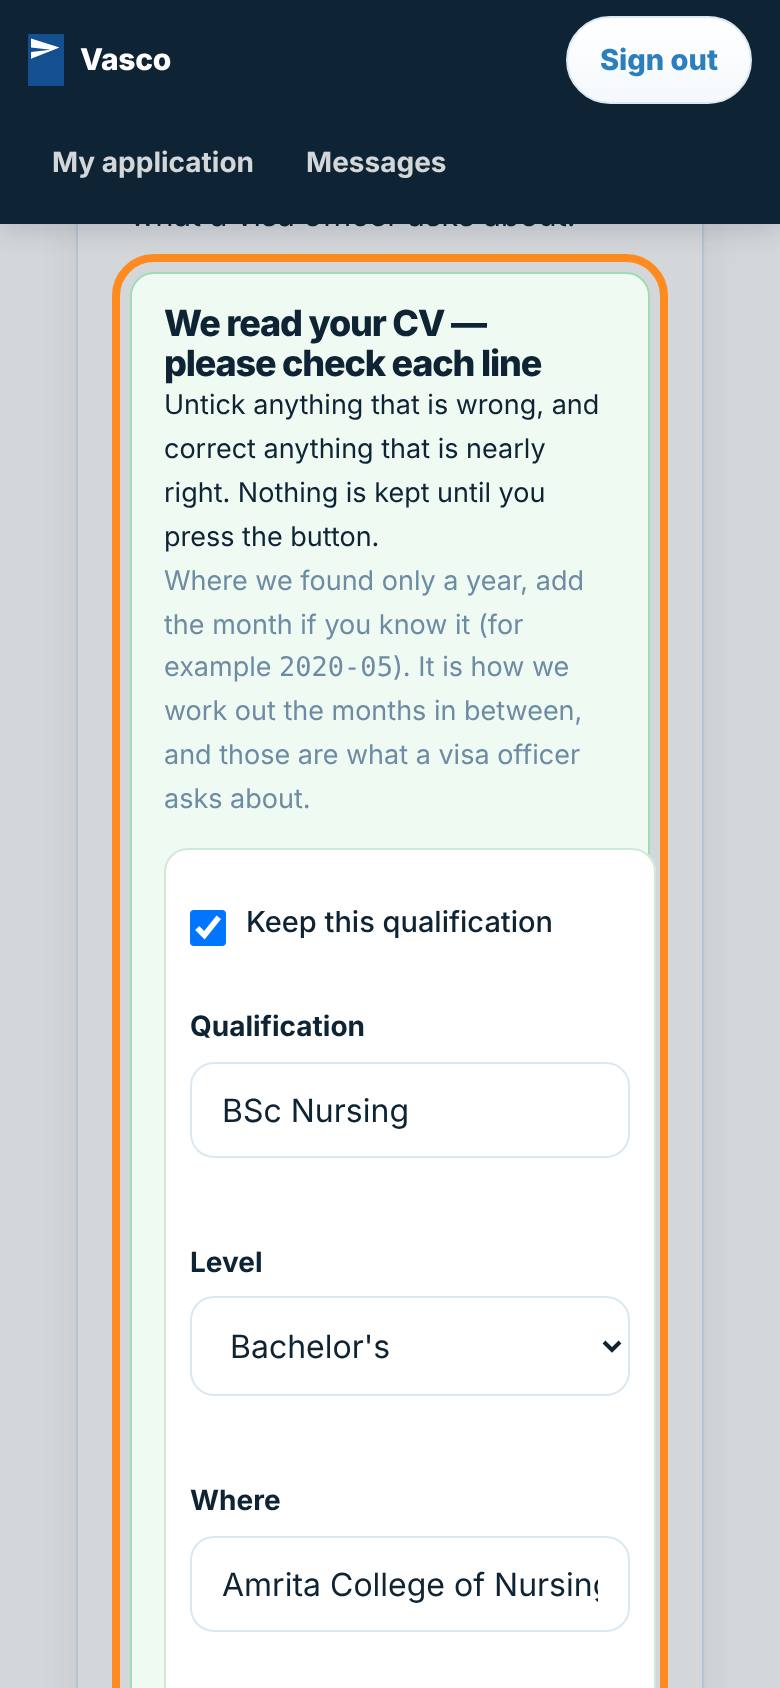 Step 6 of 13
We read your CV for you
Your qualifications and jobs are filled in from your CV. Check every line, then press Add the ticked lines.
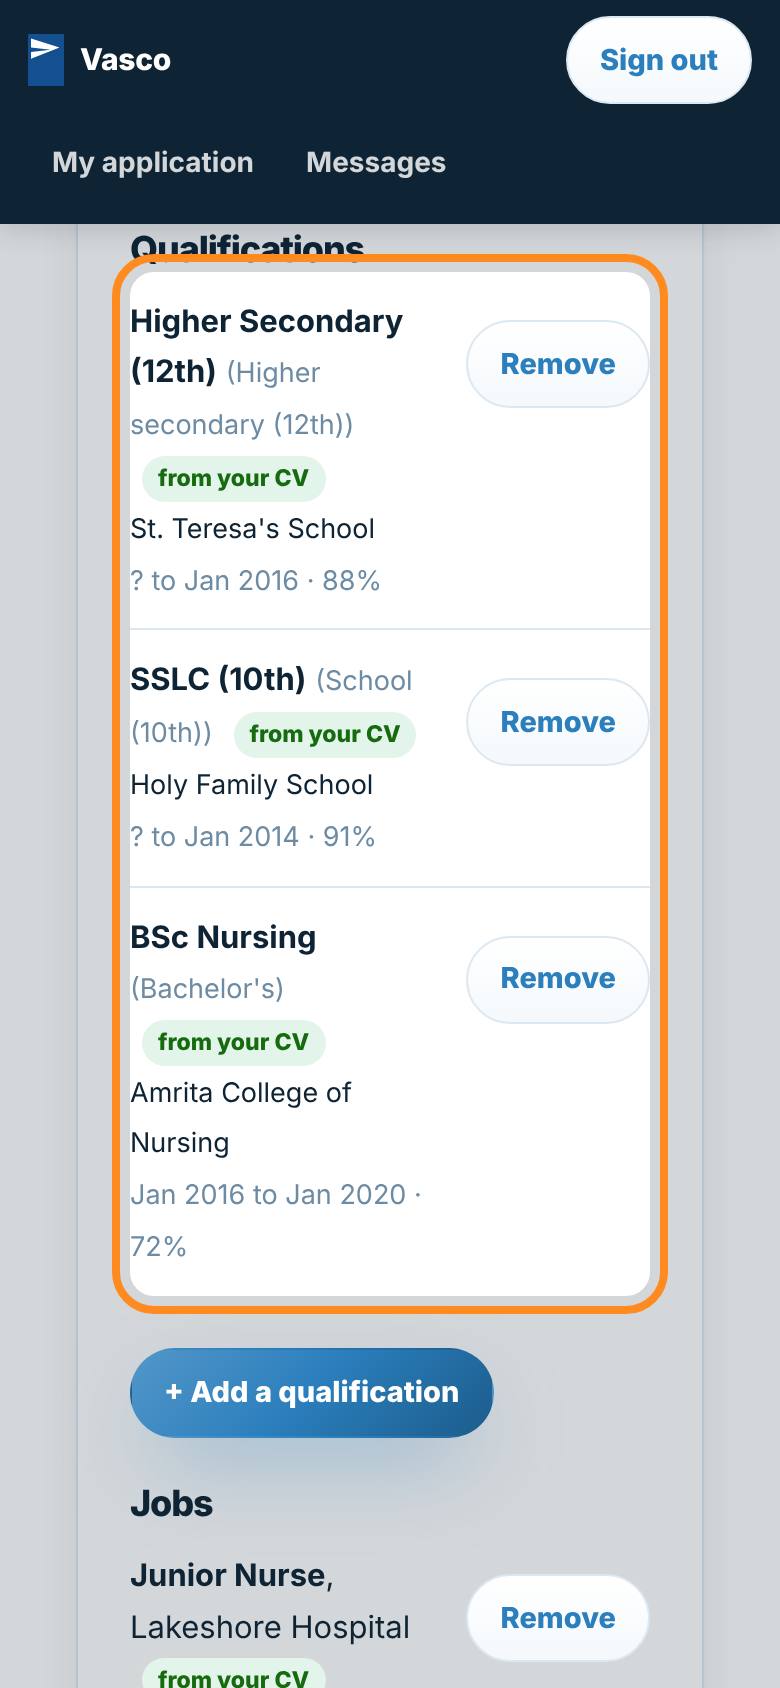 Step 7 of 13
Your studies and work, checked
Lines from your CV are marked. Add anything missing, then press This is all correct.
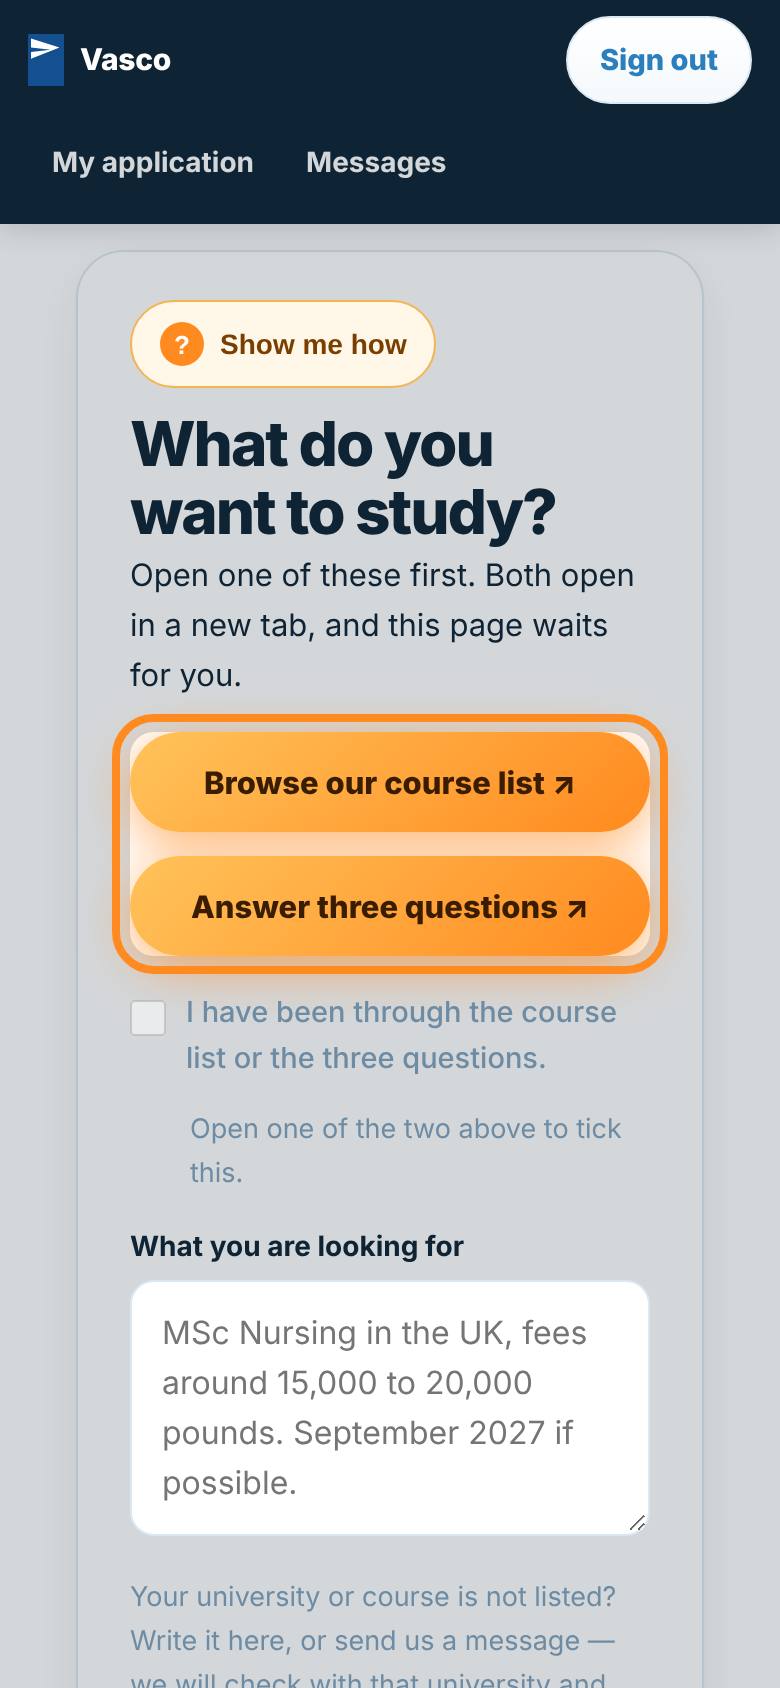 Step 8 of 13
Find your course
Press an amber button: our course list, or three quick questions. It opens in a new tab.
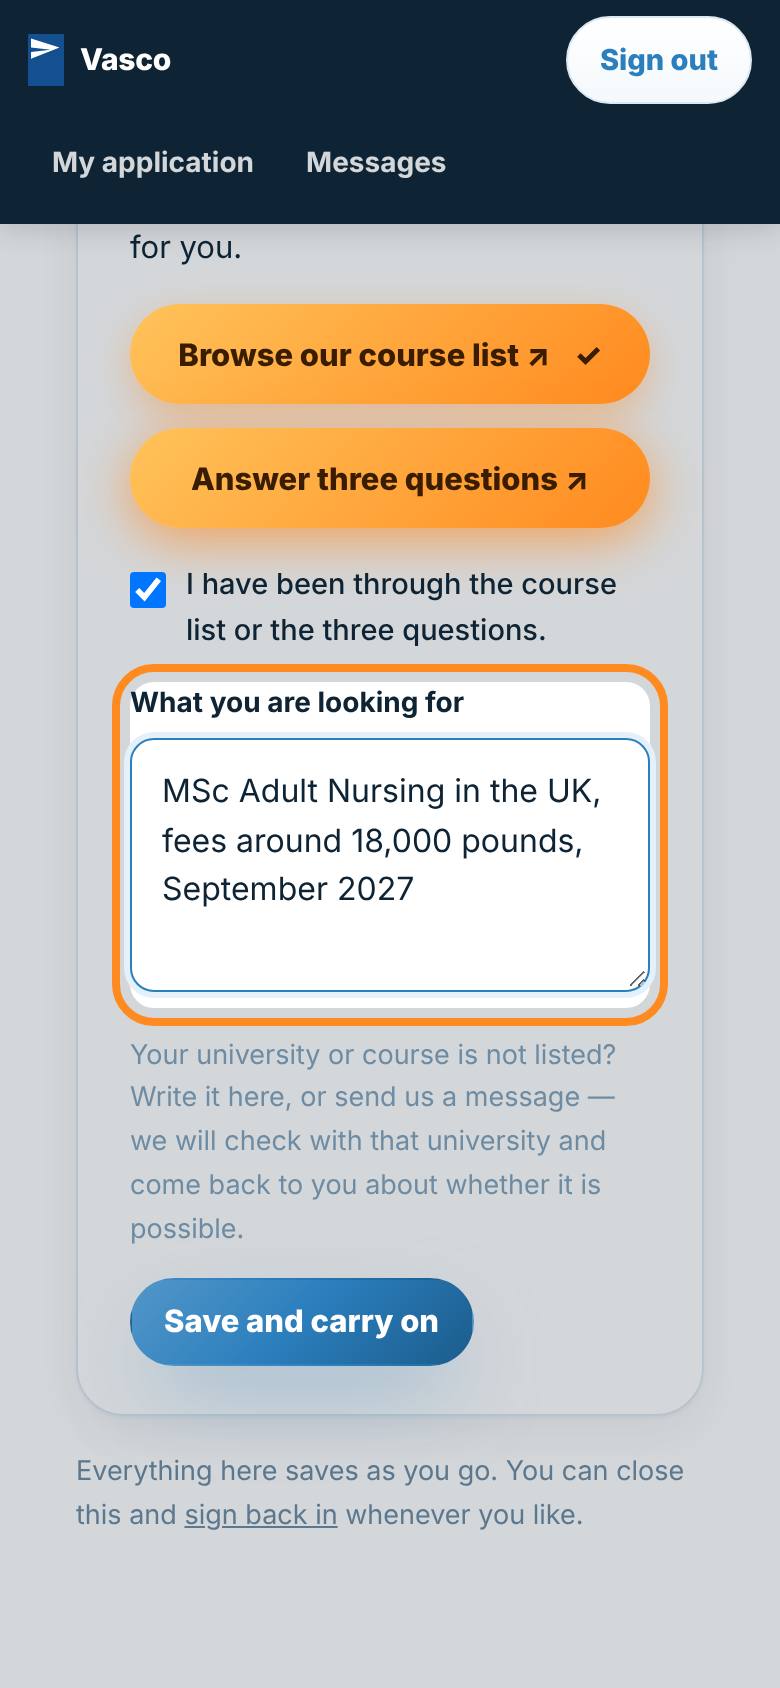 Step 9 of 13
Tell us what you want
Tick to say you have looked, and write what you want. Not in our list? Your own words are fine.
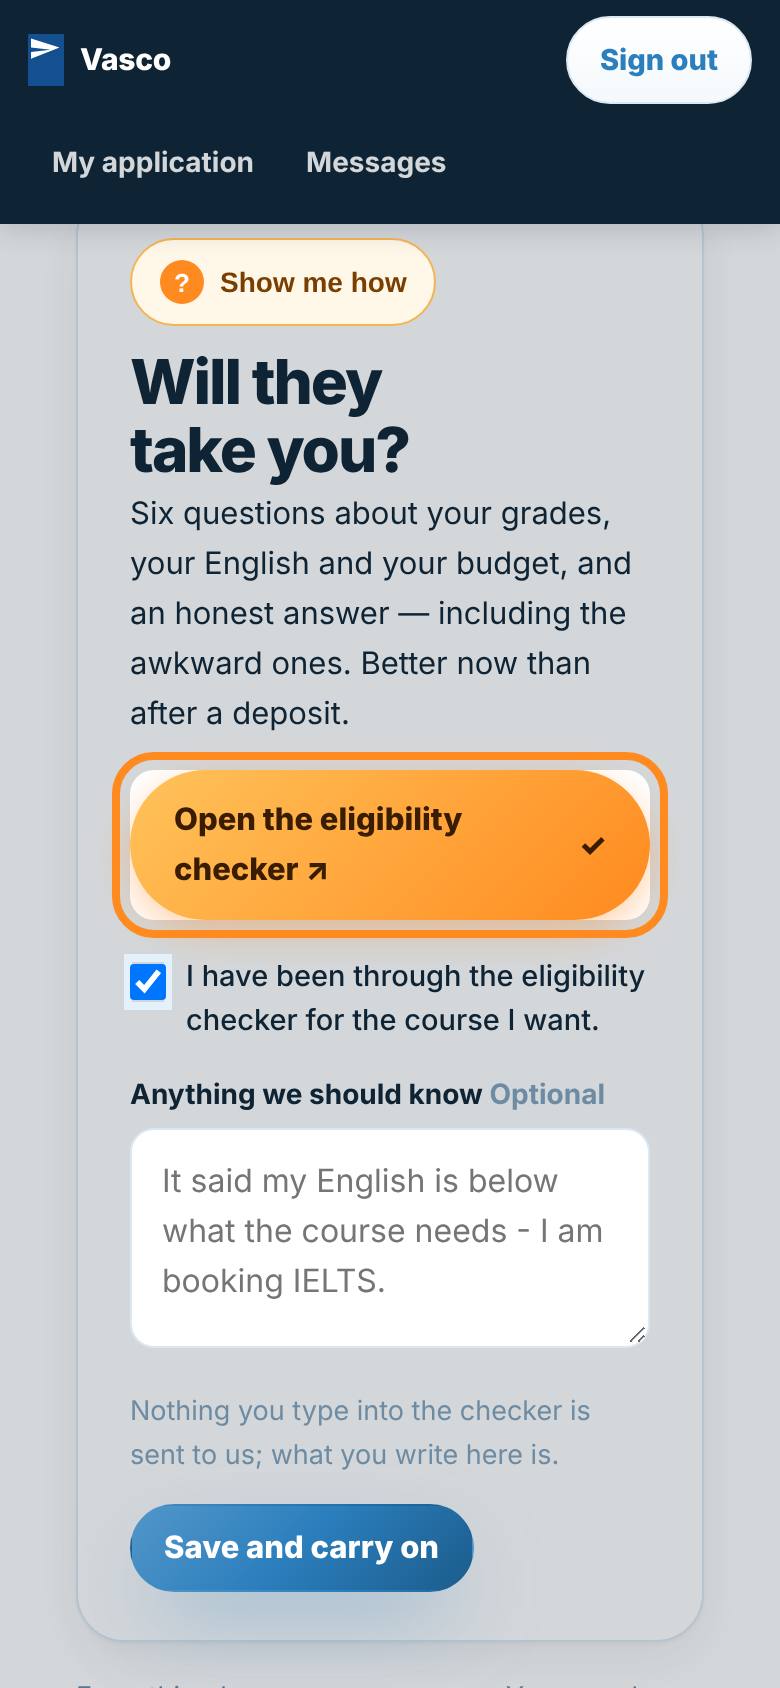 Step 10 of 13
Check you will be accepted
Open the eligibility checker, go through it, and tick to say you have.
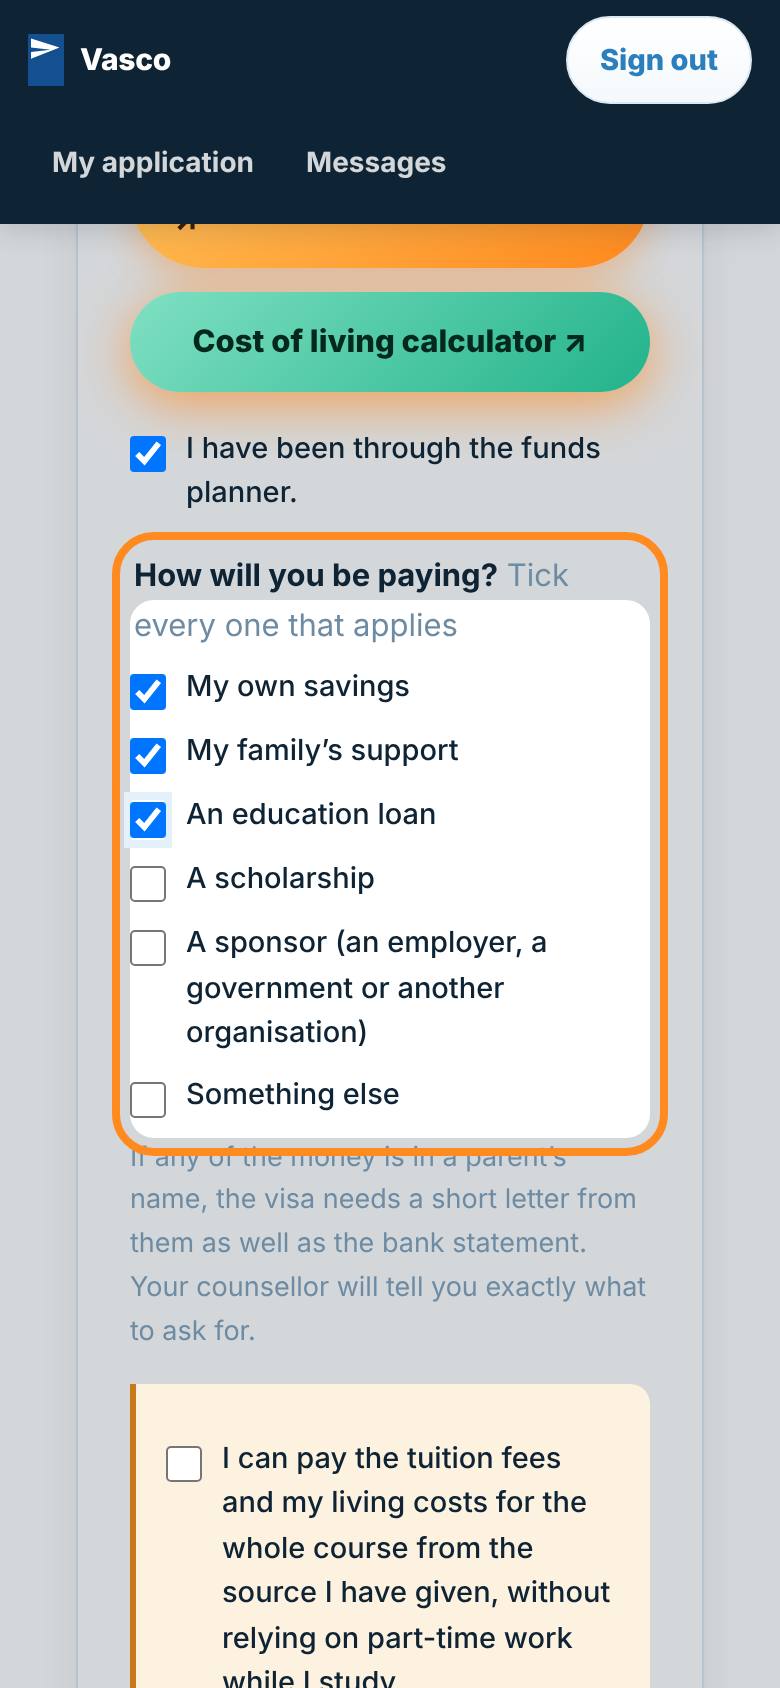 Step 11 of 13
How you will pay
Open the funds planner, then tick every way you will pay. Several together is fine.
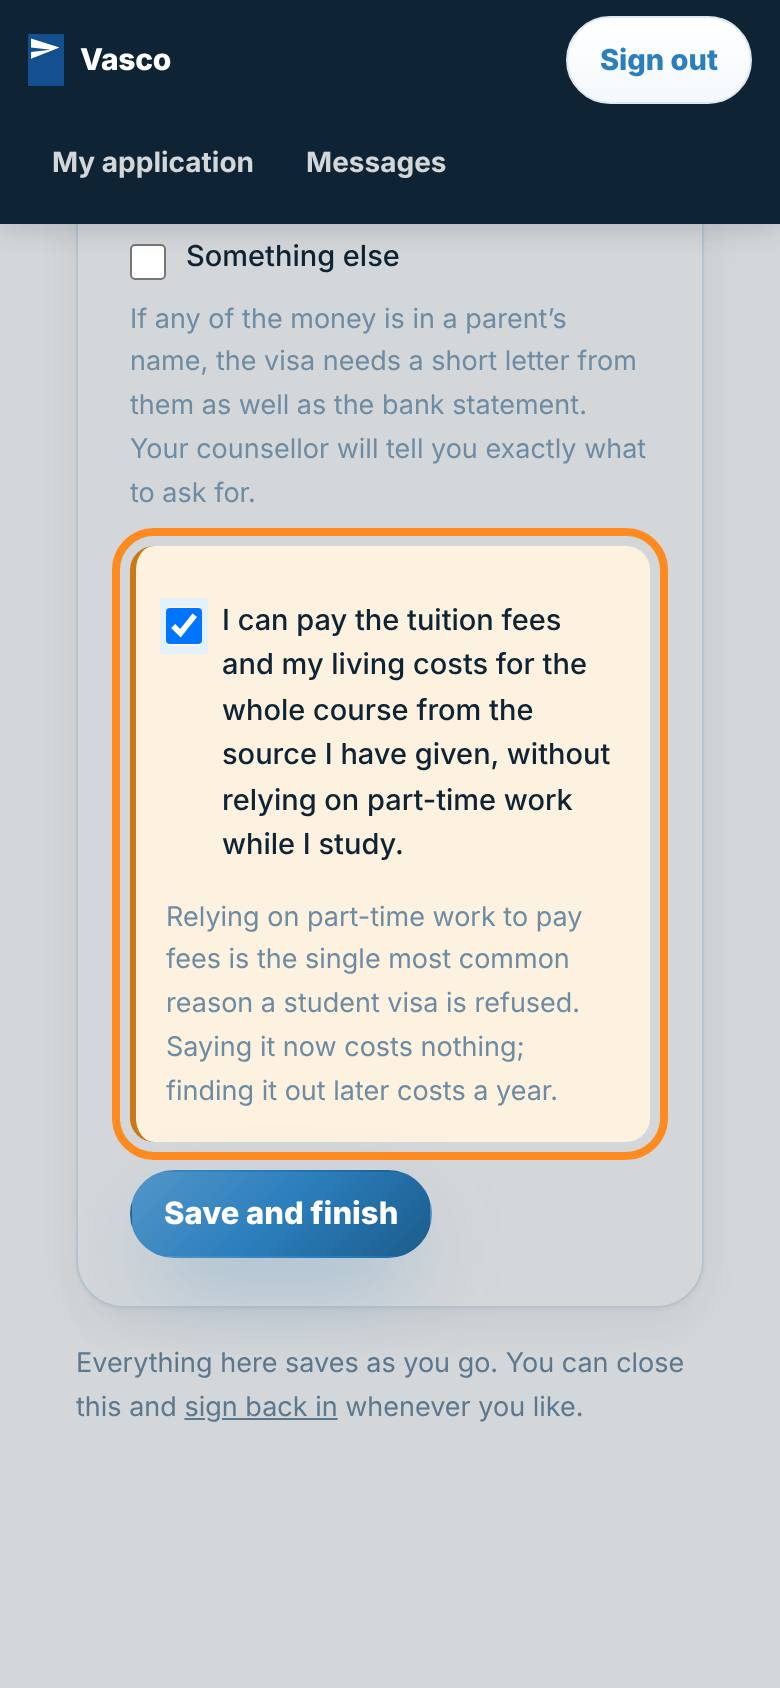 Step 12 of 13
One honest promise
Confirm you can pay without relying on part-time work. It is the most common reason a visa is refused.
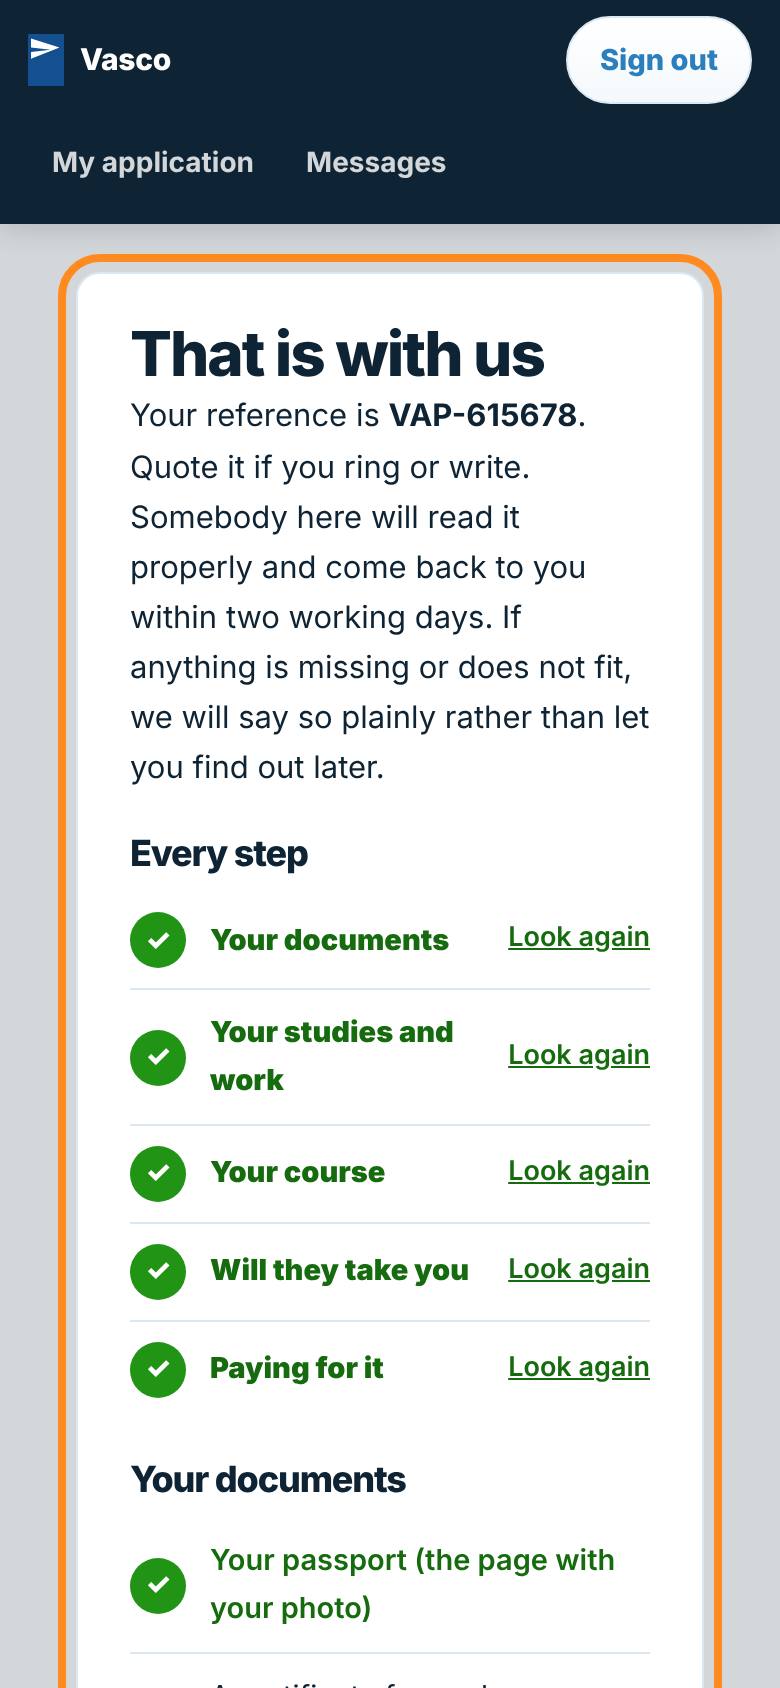 Step 13 of 13
That is with us
Done. We read it properly and come back to you within two working days. Add a document any time.
Or one step at a time
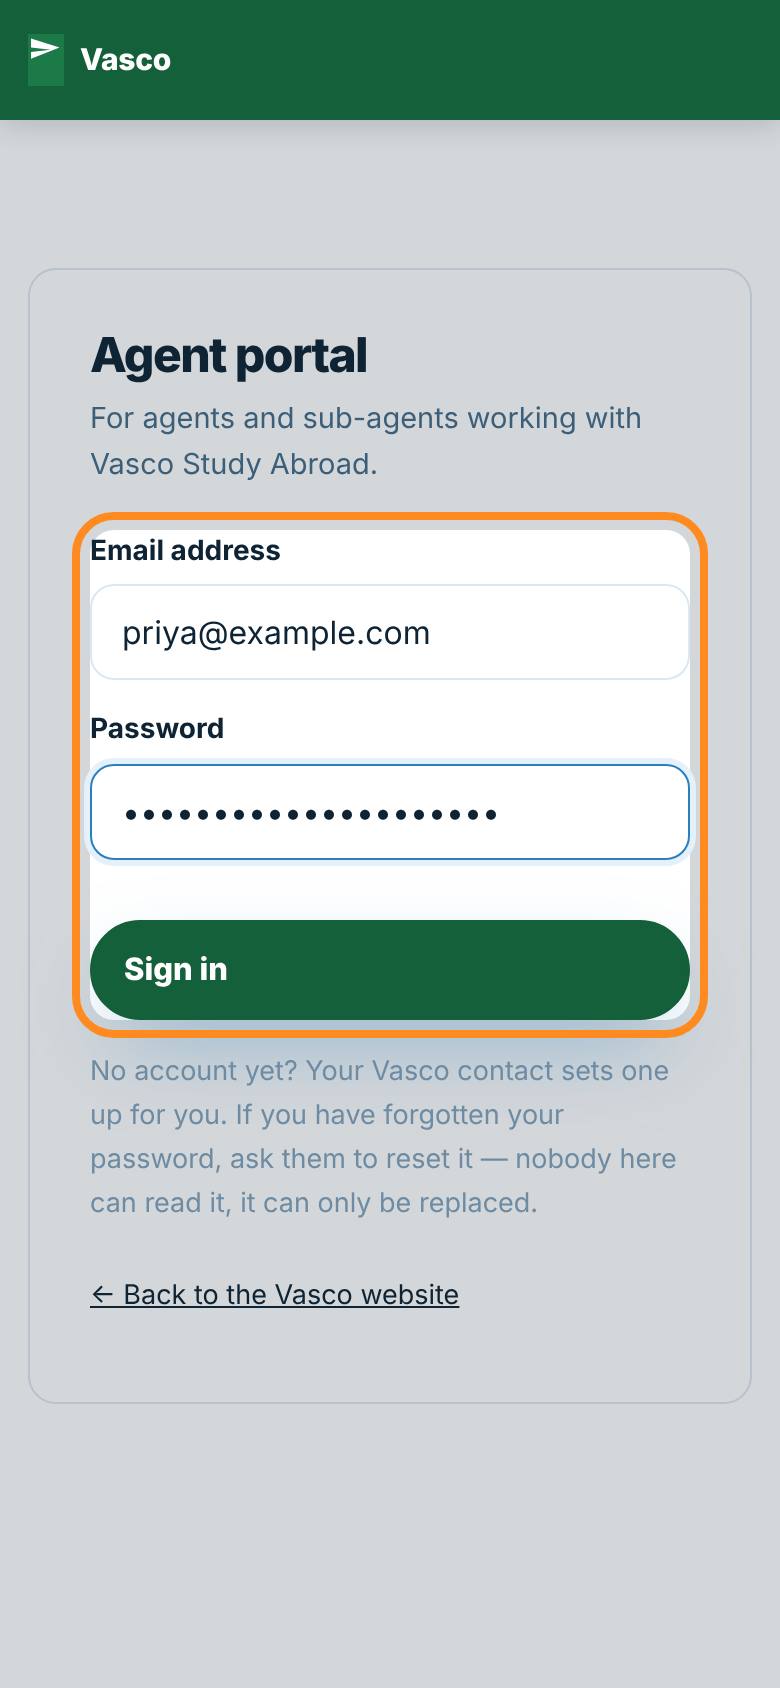 Step 1 of 8
Sign in to the agent portal
Go to vascostudyabroad.com/portal and sign in with the details we sent you.
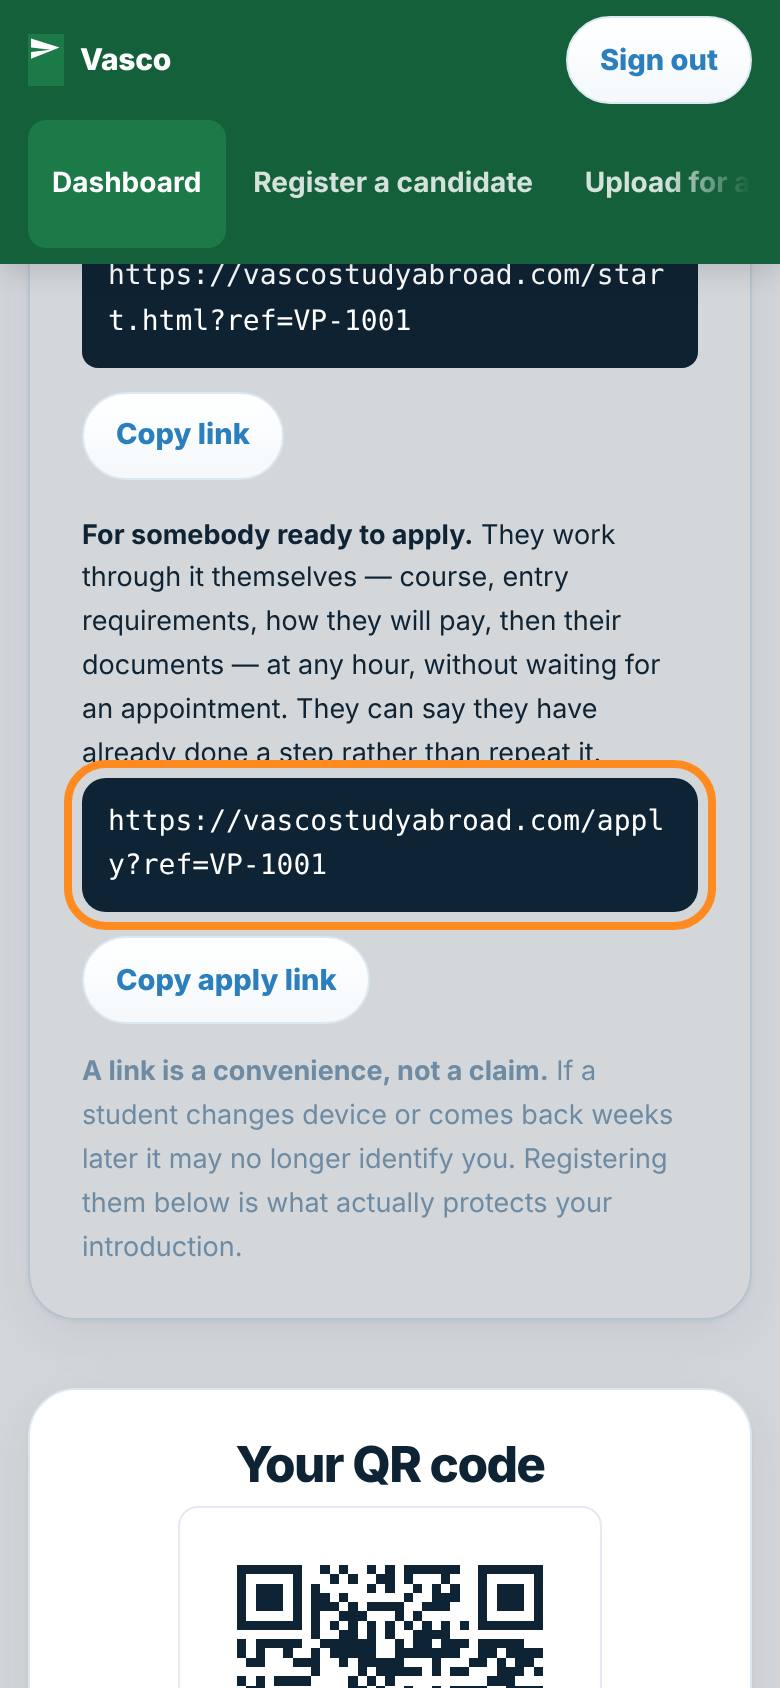 Step 2 of 8
One way: send your apply link
Copy your own apply link and send it to a student. Anything they do is credited to you.
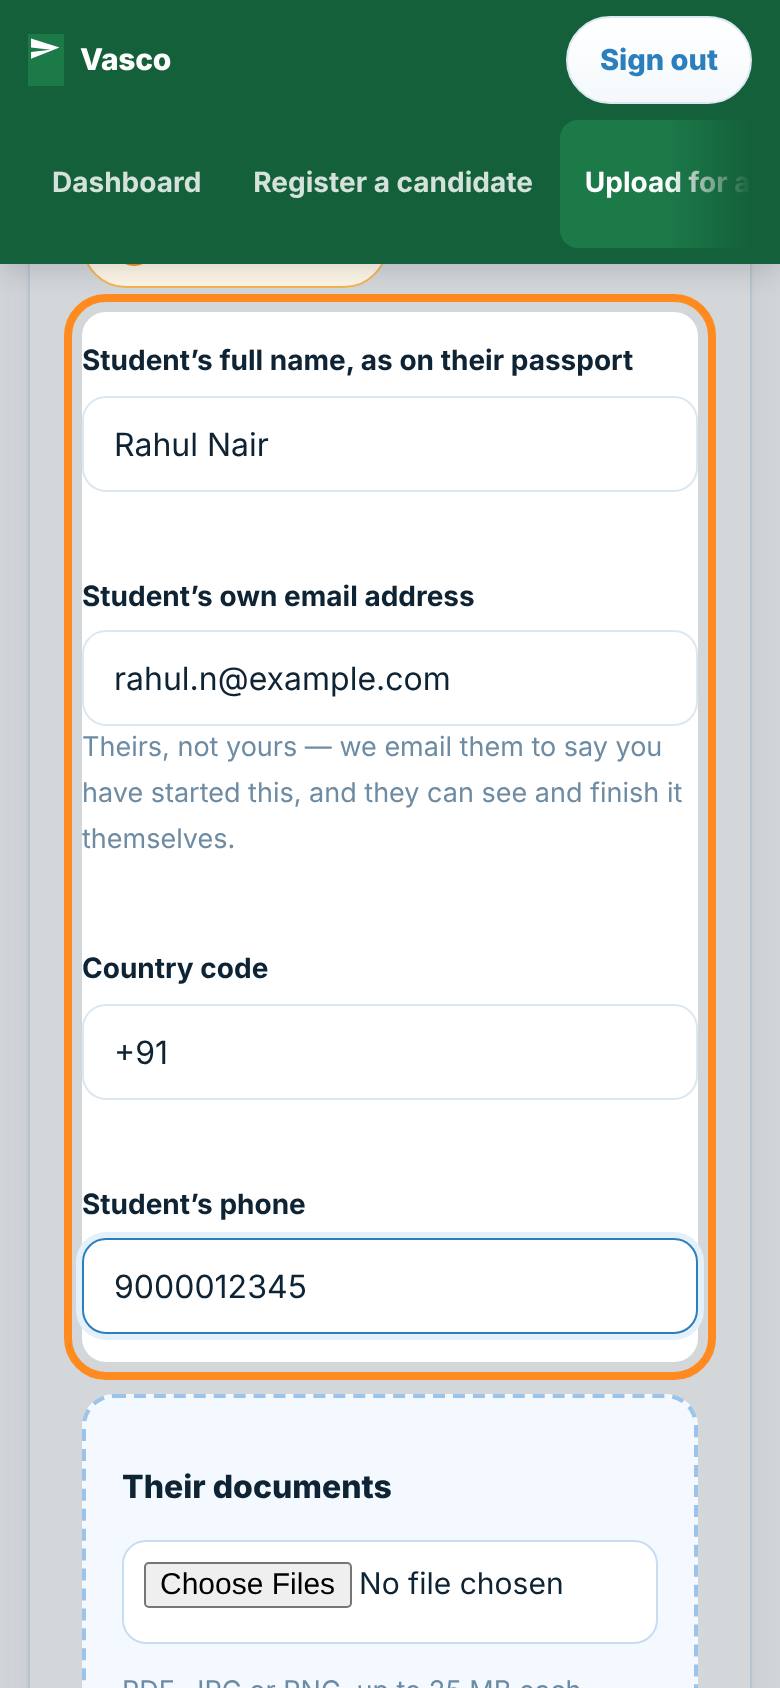 Step 3 of 8
Or upload for them
Upload for a student: their name, and THEIR email address - not yours. We tell them you started it.
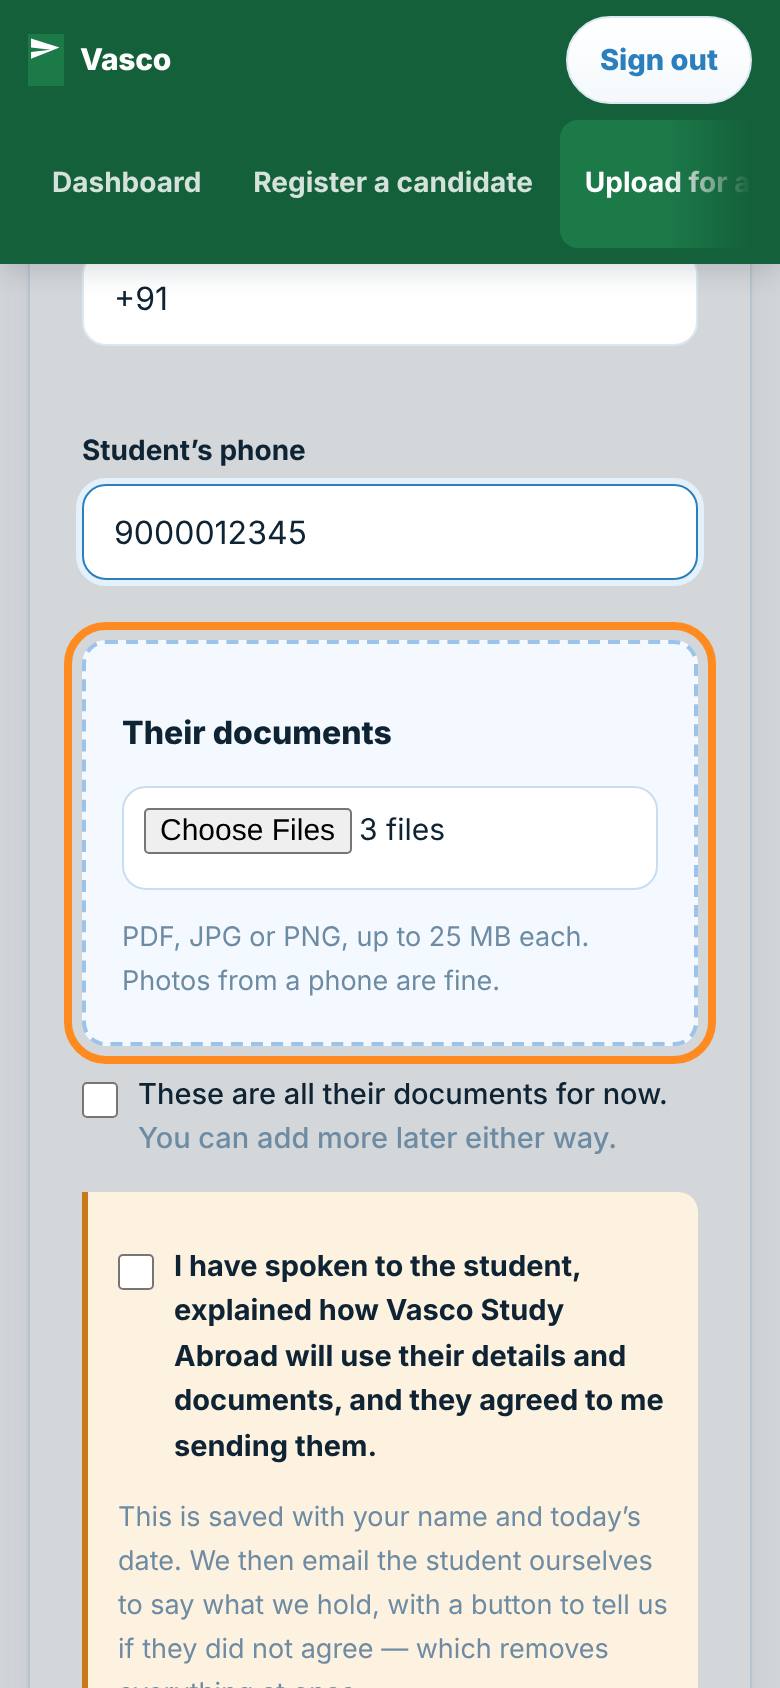 Step 4 of 8
All their documents at once
Choose every file at once: CV, passport, certificates, letters. Photos and scans are fine.
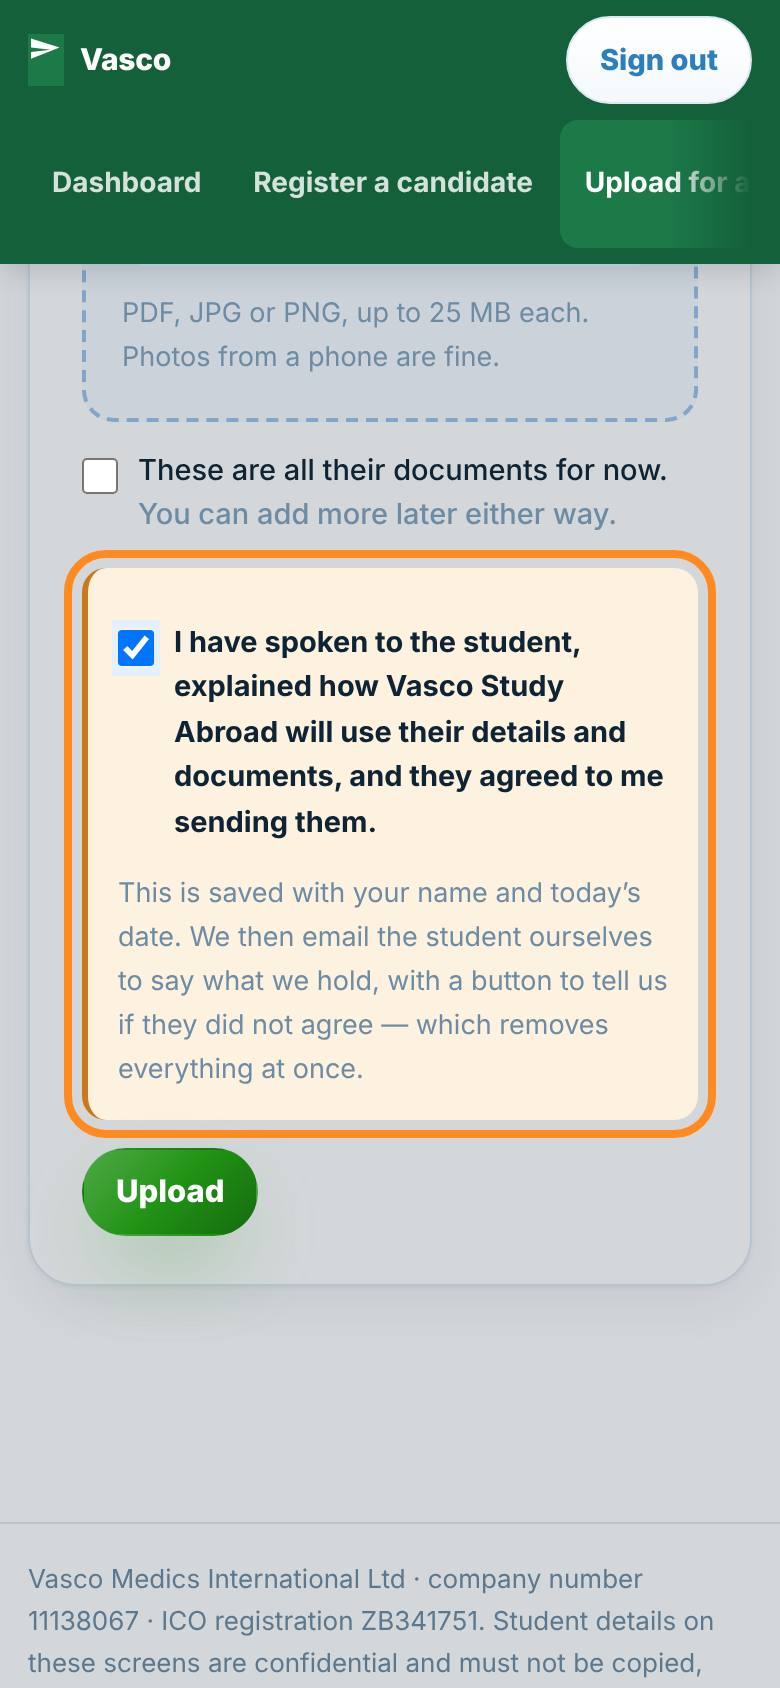 Step 5 of 8
Confirm they agreed
Tick to confirm the student agreed. It is saved with your name and the date.
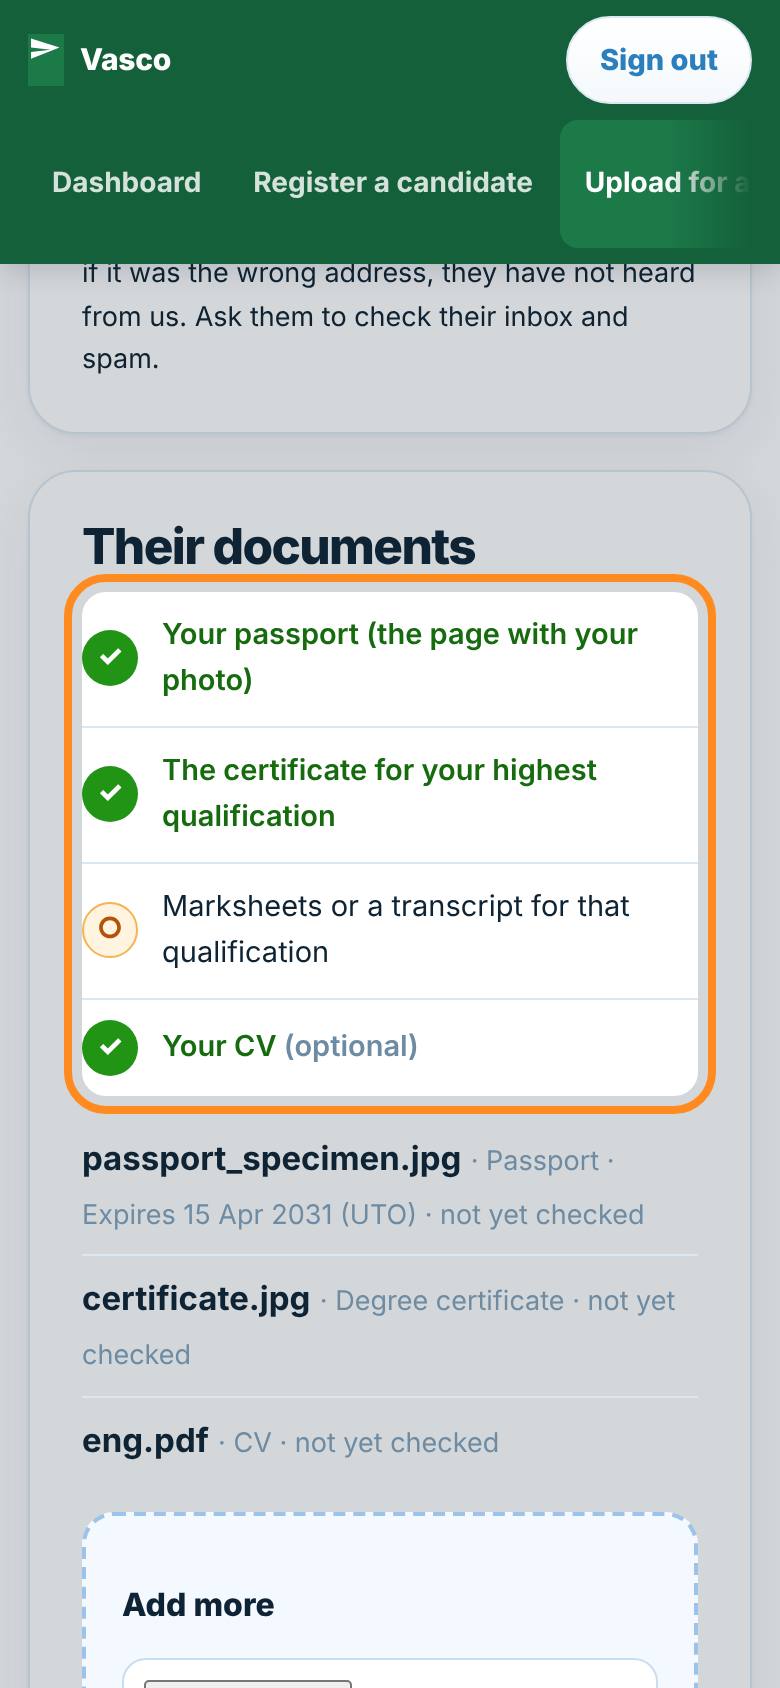 Step 6 of 8
See what is in, and what is missing
Every file is read and labelled. The list shows exactly what to chase.
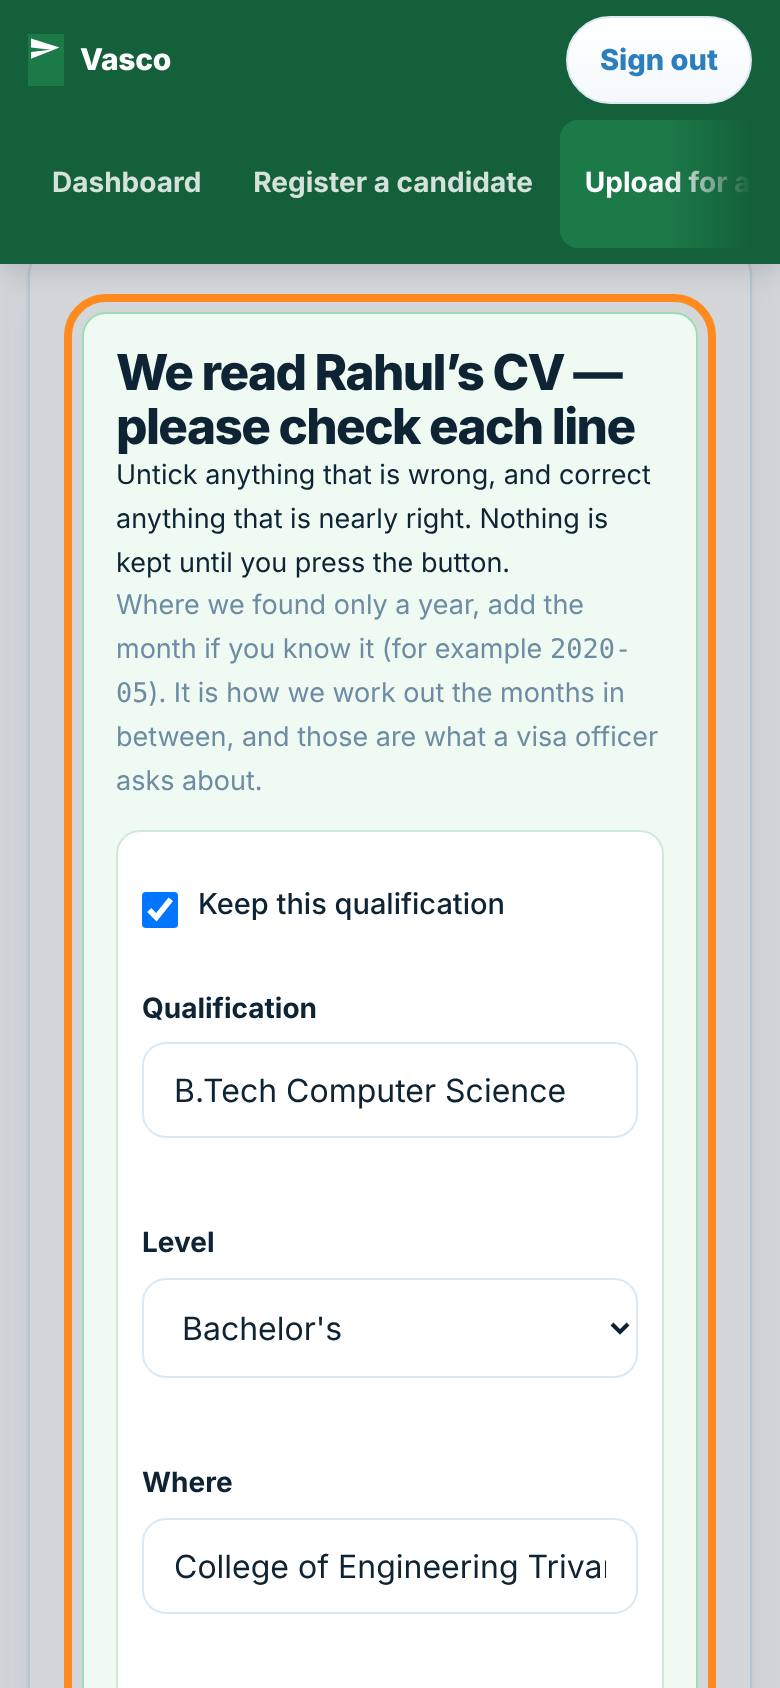 Step 7 of 8
Check what we read from the CV
Their studies and jobs are filled in from the CV. Check each line, then press Add the ticked lines.
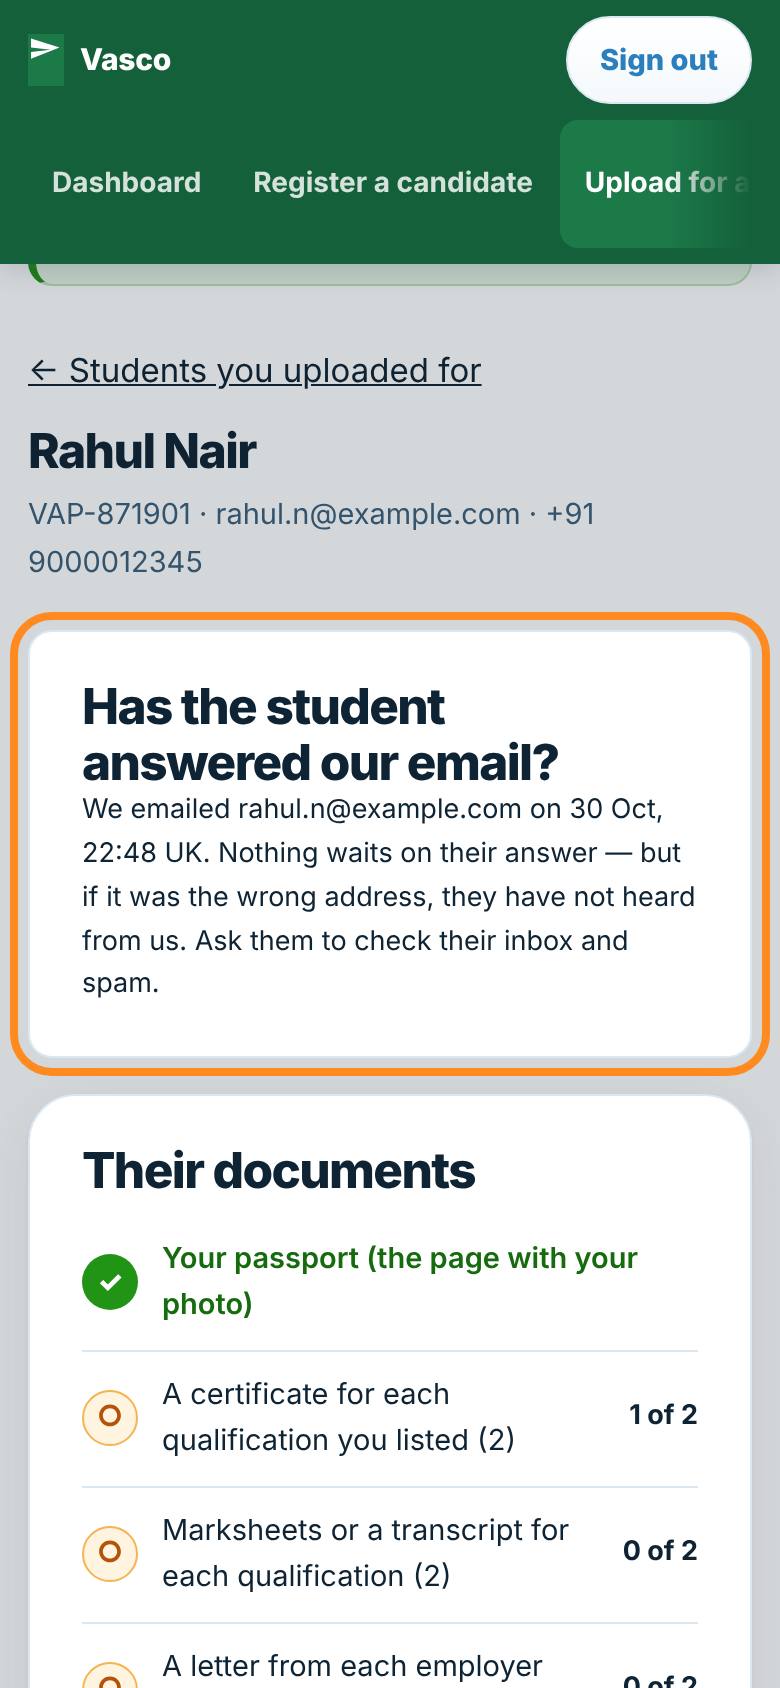 Step 8 of 8
The student hears from us
We email the student. They can confirm, or say no - which removes everything. Nothing waits on them.
Stuck on a screen? Every step of the application has a Show me how button that points to each part of the page in turn. Or message us on WhatsApp.